No products in the cart.
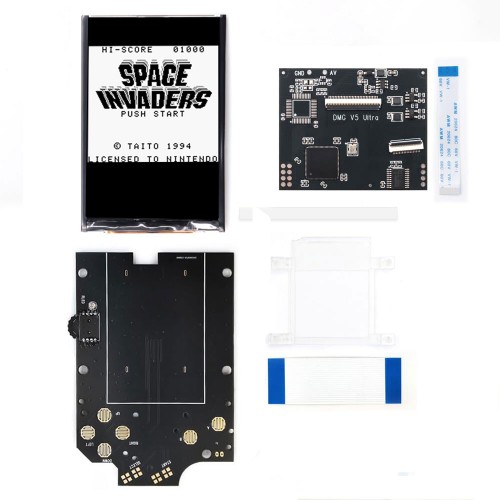
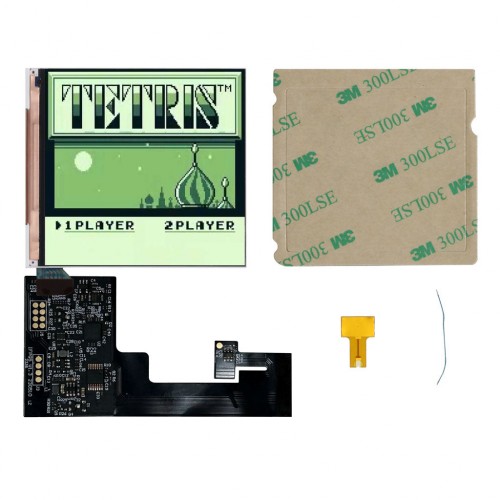
Add a modern IPS LCD to your original Game Boy DMG with this Game Boy DMG Q5 Retro Pixel IPS LCD Kit from FunnyPlaying.
FEATURES:
- Contrast wheel brightness adjustment.
- OSD menu with 15 brightness options, 36 color options, 4 display effects, frame blending option, and X/Y axis adjustment.
- 11% larger than the original display
- 0.3-0.8W power consumption vs 0.7W of the original.
- Accurate aspect ratio.
- SMD power LED.
- Only speaker soldering required (not included). Almost solderless.
- Some minor shells modifications may be required depending on your shell.
- Does not have function to adjust screen alignment.
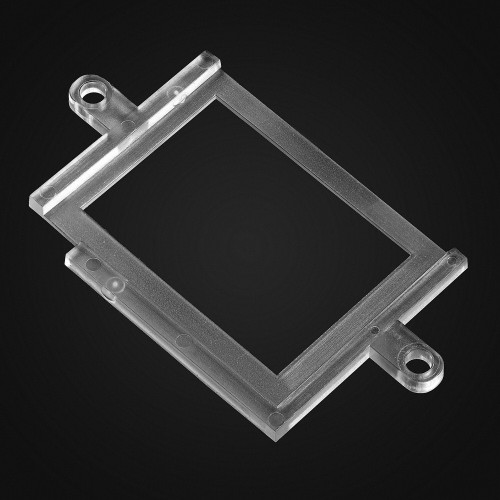
- Alignment Bracket can be purchased separately, not included with kit.
INCLUDED:
- 1x Q5 IPS LCD
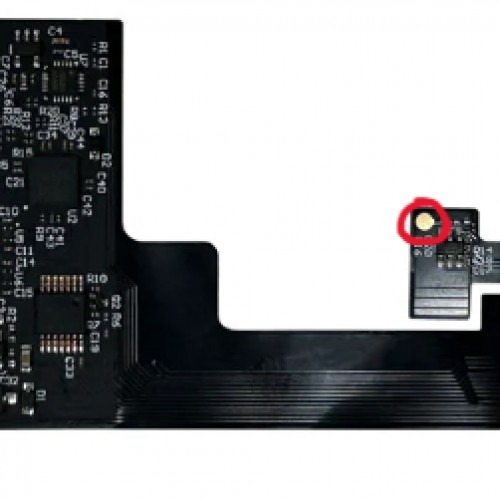
- 1x Large front PCB
- 1x PCB ribbon cable
- 1x Large Ribbon
- 1x LED diffuser
- 1x Adhesive
PAIRS WELL WITH:
- FunnyPlaying Retro Pixel Bracket
- Speaker Replacement for Game Boy
- Game Boy DMG IPS Q5 Glass Screen Lens
- Game Boy DMG Prestige IPS Modified Shell – FunnyPlaying
- Game Boy DMG Prestige IPS Modified Shell – RetroSix
DOCUMENTATION:
- Install Guide
- Install Video
- How to test your LCD kit
NOTES:
- Please disregard the portion of the ribbon cable with the touch sensor (gently tuck into top of shell) and points on cable marked “tch” and ‘pwr” as they provide no function.
- This kit has a Q5 LCD that is 11% larger than the original. A Q5 lens will be necessary to have the proper viewing window. Purchase separately.
- If you long press (two seconds) the contrast wheel while not in the OSD menu, you will notice a different OSD menu with various options appears. To our knowledge, these currently have no function.
Contrast wheel OSD menu controls:
- To enter the OSD menu, short press (one second) contrast wheel.
- To make adjustments on selected menu option, cycle wheel up and down.
- To move to the next menu option, short press (one second) contrast wheel.
- To exit the OSD menu, long press (two seconds) contrast wheel or the menu will time out on its own.
OSD menu options:
- BRT = Brightness options
- CLR = Color options
- DSP = Display Options
- FRM = Frame blending option on/off
- XST = X axis adjustment
- YST = Y axis adjustment
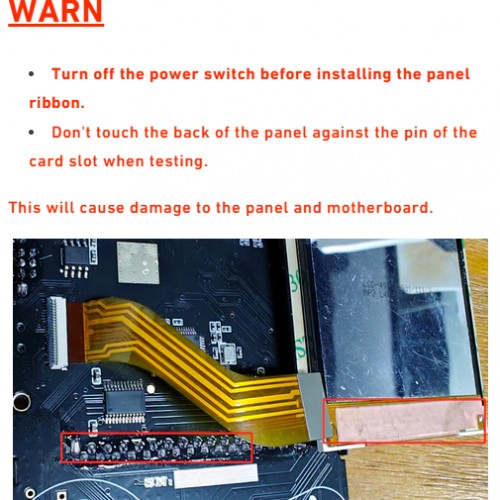
WARNINGS:
- Test before installation! When you receive a backlight/LCD kit, you should perform a dry run before installing to assure that nothing has been damaged in transit. A dry run or test fit means the kit is not installed in the shell. This includes the use of adhesives, brackets, and any performed soldering. All ribbon cables should have no bends or creases in them. If you are unsure how to perform a dry run, please contact our support team and we will be happy to help. Backlight kits that have been installed are not eligible for replacement or return.
- LCD may break if put under too much pressure or dropped. Please exercise extreme caution when installing.
Be the first to review “Game Boy DMG Retro Pixel Q5 IPS LCD Backlight Kit – FunnyPlaying”
Related products
Sale!
Original price was: $19.99.$5.00Current price is: $5.00.
Sale!
Original price was: $61.99.$15.50Current price is: $15.50.
Sale!
Game Boy | DMG | Original
Original price was: $2.49.$0.50Current price is: $0.50.
Sale!
Game Boy | DMG | Original
Game Boy DMG Display Stand – Rose Colored Gaming – Clearance
Original price was: $4.99.$1.00Current price is: $1.00.
Sale!

Game Boy | DMG | Original
Game boy DMG and Game Boy Advance Game Box Protector – Clearance
Original price was: $1.99.$0.50Current price is: $0.50.
Sale!

FUNNYPLAYING
Original price was: $89.99.$22.50Current price is: $22.50.
Sale!
Game Boy | DMG | Original
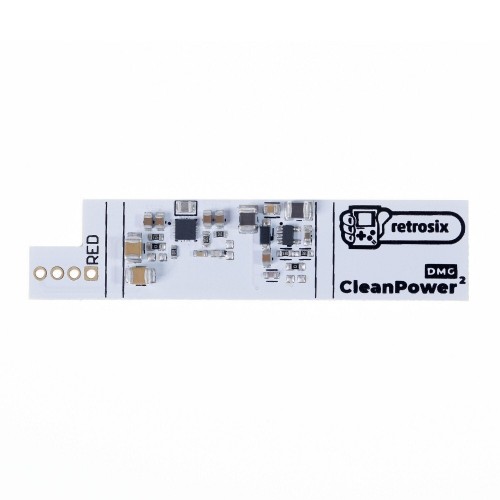
Game Boy DMG CleanPower (v2.0) DC-Regulator Board – RetroSix
Original price was: $29.99.$7.50Current price is: $7.50.
Sale!
Game Boy | DMG | Original
Original price was: $3.99.$1.00Current price is: $1.00.
Reviews
There are no reviews yet.